Adding Videos in the Lesson Designer (Video)
If you wish to upload your own content to be used in lessons, please note that your video needs to be in MV, MP, MOV, WMV, AVI, FLV, WEBM, GPP, or MPEG format with a 200MB limit. To check this from a PC, right click on the video and select “Properties”.
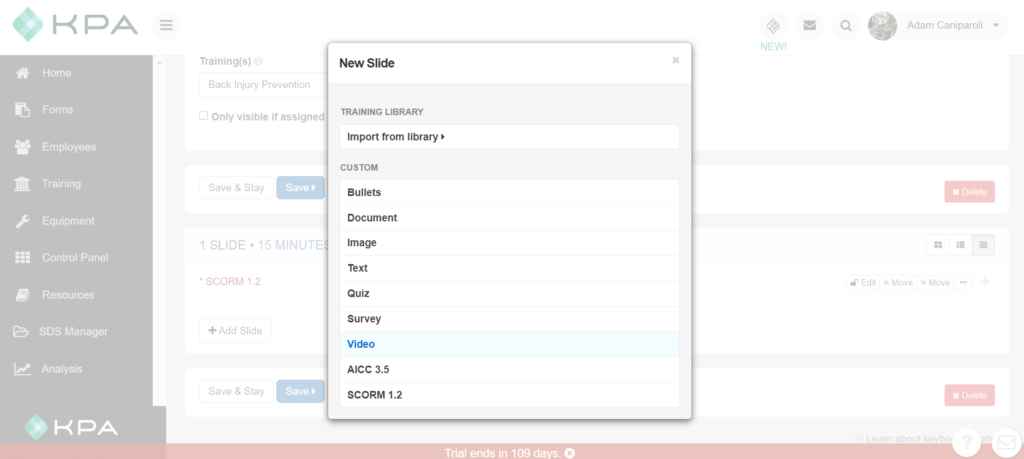
To add a video from the Lesson Designer, select “+Add Slide” and choose “Video”:
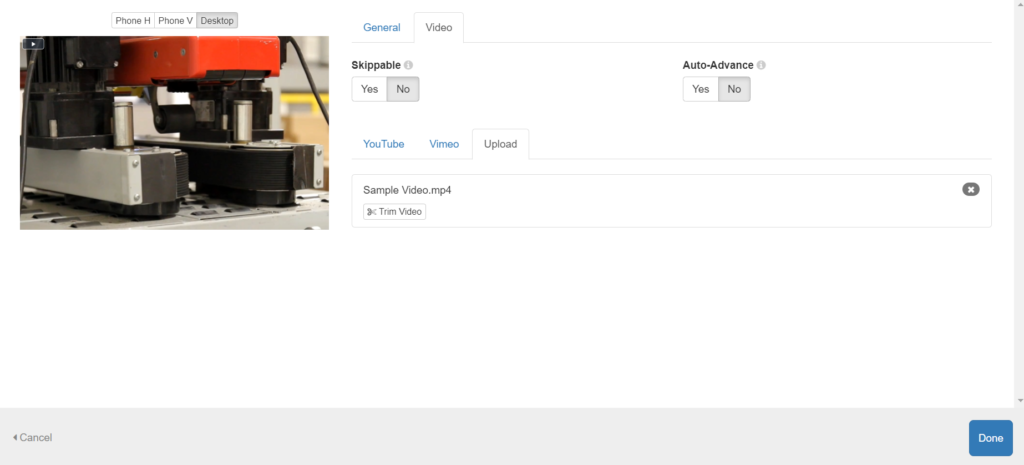
From here, you can choose to either add a link from YouTube or Vimeo, or you may upload your own video directly from your computer. Choose “Upload” to add a file directly from your computer:

Select “Done”, if you don’t need to make any changes. If you wish to shorten or trim your video, select “Trim Video”.
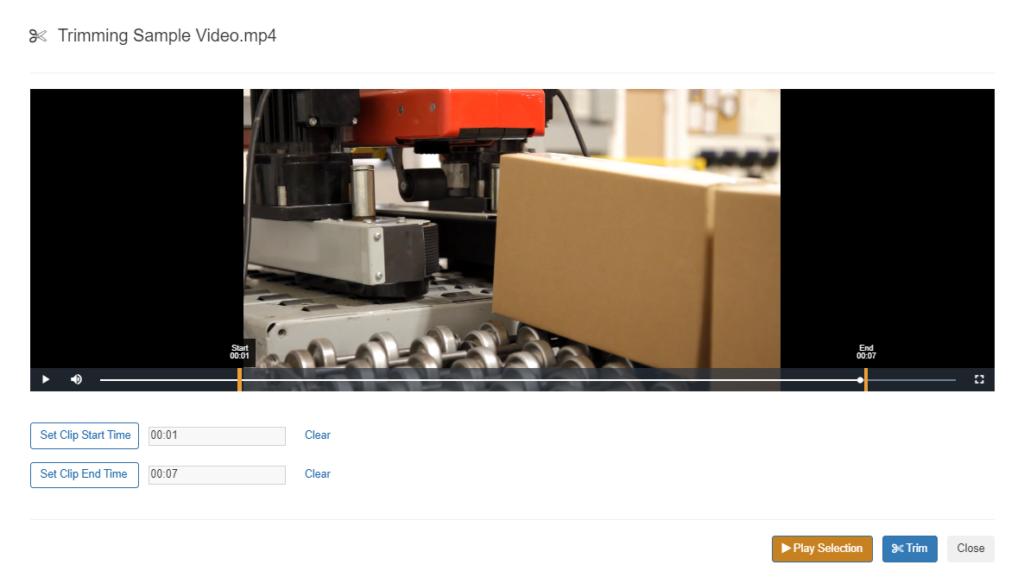
From here, you can drag the progress bar to any given point, and select “Set Clip Start Time” to set a new starting point. Now drag the progress bar again to where you wish to end the video, and select “Set Clip End Time”. You can select “Play Selection”, to review your edits, and when you’re satisfied, select “Trim” to save your changes and re-process the video.
Close this window to return to the previous screen. Select “Done”, to return back to the Lesson Designer page.
To see this all in-action, please refer to the video below. Thank you!

